


Types of 300 TDI Engines
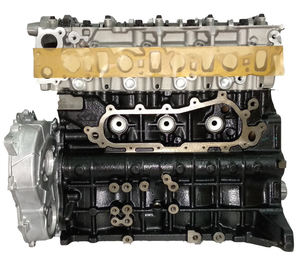
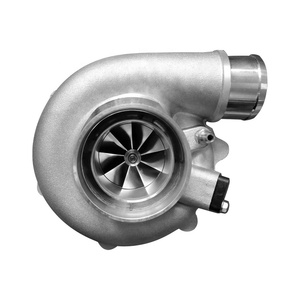
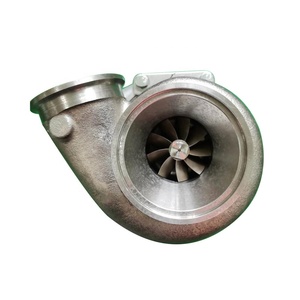
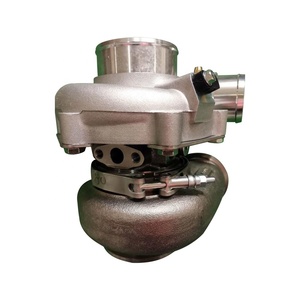
The 300 TDI engine is a turbocharged Direct Injection diesel engine widely used in Land Rover and Range Rover vehicles. Renowned for its exceptional durability, impressive fuel efficiency, and mechanical simplicity, this engine offers improved torque and power compared to its predecessors, making it a favorite among off-road enthusiasts and daily drivers alike.
Engine Fact: The 300 TDI was manufactured between 1994 and 2006, earning a reputation as one of Land Rover's most reliable and serviceable engines, with many units still operating efficiently after 300,000+ miles.
300 TDI Engine Upgrade
The upgrade package is designed for owners seeking enhanced performance without replacing the entire engine. These comprehensive kits typically include:
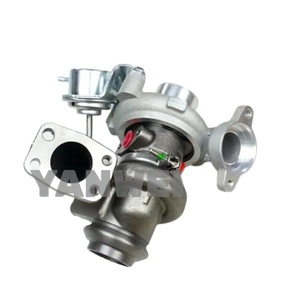
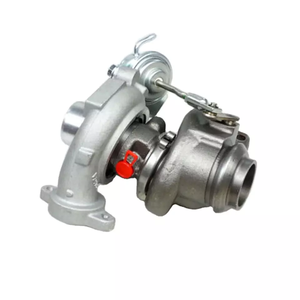
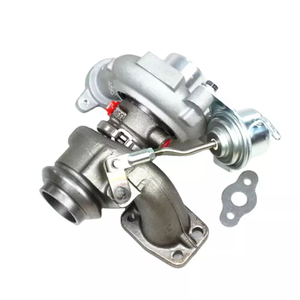
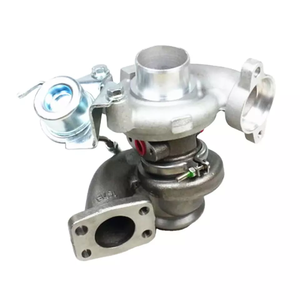
- Performance-tuned turbocharger
- High-flow fuel injectors
- Modified intake systems
- Recalibrated engine management systems
Performance gains: 15-30% increase in horsepower and torque
300 TDI Engine Rebuild
A rebuild option breathes new life into aging engines while maintaining original specifications. Complete rebuild kits include:
- Piston rings, gaskets and seals
- Main and rod bearings
- Oil pump and water pump
- Timing components
- Valve train components
Cost-effective solution: 40-60% less expensive than replacement
300 TDI Engine Conversion
Converting from petrol or older diesel engines to the 300 TDI delivers significant improvements. Conversion kits include:
- Complete engine assembly or remanufactured unit
- Custom engine mounts
- Adaptation wiring harness
- Modified cooling system components
- Transmission adapter plates
Key benefits: Improved fuel economy, increased torque, enhanced reliability
| Engine Option | Best For | Cost Range | Installation Complexity | Performance Impact |
|---|---|---|---|---|
| Upgrade Kit | Current 300 TDI owners seeking more power | $800-$2,500 | Moderate | 15-30% increase |
| Rebuild Kit | High-mileage engines with good blocks | $1,200-$3,500 | High | Restoration to factory specs |
| Conversion | Older vehicles with less efficient engines | $3,500-$7,000 | Very High | Significant improvement over original |
Specifications and Technical Details
The 300 TDI engine features robust engineering and reliable performance characteristics that have made it a cornerstone of Land Rover's reputation for durability. Understanding these specifications helps owners make informed decisions about maintenance and modifications.
| Specification | Details | Impact on Performance |
|---|---|---|
| Displacement | 2.5 liters (2500 cc) | Provides balanced power and efficiency |
| Cylinder Arrangement | Straight-six (I-6) | Ensures smooth operation and good torque delivery |
| Maximum Power | 90-120 hp (67-89 kW) at 4000 rpm | Sufficient for most on-road and off-road applications |
| Maximum Torque | 180-260 lb-ft (245-353 Nm) at 2000-2500 rpm | Excellent low-end pulling power for towing and off-roading |
| Fuel System | Direct injection | Improves fuel atomization and combustion efficiency |
| Turbocharger | Variable geometry turbocharger (VGT) | Reduces lag and improves power delivery across RPM range |
| Compression Ratio | 19:1 | Optimizes diesel combustion for efficiency |
| Emissions Control | EGR and catalytic converter | Reduces harmful emissions while maintaining performance |
Essential Maintenance Schedule
Regular maintenance is crucial for maximizing the legendary durability of the 300 TDI engine. Follow this schedule to ensure optimal performance and longevity:
- Every 5,000 km (3,000 miles): Change engine oil and oil filter using high-quality diesel-specific oil that meets manufacturer specifications
- Monthly: Check coolant level and condition, topping up with the correct coolant type as needed
- Every 20,000 km (12,000 miles): Replace air filter (more frequently in dusty conditions)
- Every 40,000 km (24,000 miles): Replace fuel filter to prevent contamination
- Every 60,000 km (37,000 miles): Inspect and potentially replace timing belt
- Every 100,000 km (60,000 miles): Change coolant completely
- Every 50,000 km (30,000 miles): Flush cooling system to remove buildup
Critical Warning: Never ignore timing belt maintenance on the 300 TDI. A failed timing belt can cause catastrophic engine damage as this is an interference engine. Replace the belt every 60,000 miles or 5 years, whichever comes first.
How to Choose the Right 300 TDI Engine
Selecting the ideal 300 TDI engine requires careful consideration of several key factors to ensure it meets your specific requirements and operating conditions.
Advantages of 300 TDI Engines
- Exceptional reliability and durability
- Impressive fuel efficiency (up to 30 MPG highway)
- Strong torque delivery at low RPM
- Relatively simple mechanics for DIY maintenance
- Extensive aftermarket support and parts availability
- Excellent cold-weather starting capabilities
Limitations to Consider
- Lower peak horsepower than modern diesels
- Heavier than some alternative engines
- Older emissions technology
- Can be noisy compared to newer designs
- Limited electronic management capabilities
- May require more frequent maintenance
Key Selection Criteria
- Intended Use: Consider whether you need the engine for off-road adventures, everyday driving, or heavy towing applications. Each use case might warrant different specifications or modifications.
- Installation Requirements: Evaluate the complexity of installation in your specific vehicle. Some applications require extensive modifications to engine mounts, cooling systems, and electronics.
- Maintenance Accessibility: Check that critical maintenance points like the timing belt, tensioner, and water pump are easily accessible in your vehicle's engine bay configuration.
- Budget Considerations: Determine your total budget including the engine, installation components, and potential modifications needed for your application.
- Performance Requirements: Assess whether the standard output (90-120 hp) meets your needs or if you'll require performance upgrades for additional power.
- Fuel Efficiency: If economy is a priority, consider engines with modern fuel system upgrades or those that have been professionally rebuilt to factory specifications.
- Noise and Vibration Tolerance: Be aware that the 300 TDI produces more noise and vibration than modern engines; determine if this is acceptable for your application.
Buyer's Tip: When purchasing a used 300 TDI engine, always check the engine's history and look for compression test results. A good 300 TDI should have even compression across all cylinders (approximately 350-400 psi). Request oil analysis reports if available, as these can reveal the internal condition of the engine.
DIY 300 TDI Engine Replacement Guide
Replacing a 300 TDI engine is a complex but rewarding project for those with mechanical skills. This step-by-step guide will help you navigate the process safely and effectively.
Safety Warning: Engine replacement involves heavy components and potentially dangerous tools. Always use proper lifting equipment, wear appropriate safety gear, and have a second person assist with critical steps.
Required Tools and Materials
Essential Tools
- Engine hoist (minimum 1-ton capacity)
- Engine stand
- Socket set and wrenches (metric)
- Torque wrench
- Timing tool kit specific to 300 TDI
- Drain pans
- Jack stands
- Wire brushes and cleaning supplies
Materials Needed
- Replacement 300 TDI engine
- Engine oil (5-7 liters)
- Oil filter
- Coolant (8-10 liters)
- New gaskets and seals kit
- Fuel filter
- Air filter
- Timing belt kit (if not recently replaced)
Step-by-Step Replacement Process
-
Preparation
Park the vehicle on a level surface, disconnect the battery, and ensure you have adequate workspace. Take photos of all connections before dismantling to serve as references during reassembly.
-
Fluid Drainage
Drain all fluids from the engine, including coolant, engine oil, and fuel. Dispose of used fluids properly according to local regulations.
-
Disconnect Components
Systematically disconnect all electrical connections, fuel lines, cooling lines, exhaust components, and transmission linkages. Label each connection clearly to ensure proper reconnection.
-
Remove Accessories
Remove the alternator, power steering pump, A/C compressor, and other accessories attached to the engine that can be reused.
-
Separate Transmission
If necessary, separate the engine from the transmission by removing the bell housing bolts. Support the transmission to prevent damage when the engine is removed.
-
Engine Removal
Attach the engine hoist securely to designated lifting points on the engine. Carefully raise the engine, checking for any remaining connections, then remove it completely from the vehicle.
-
Prepare New Engine
Transfer any necessary components from the old engine to the new one, such as manifolds, sensors, and brackets that aren't included with the replacement engine.
-
Install New Engine
Lower the new engine carefully into position, ensuring proper alignment with the transmission and engine mounts. Secure all mounting bolts to the manufacturer's specified torque.
-
Reconnect Systems
Reconnect all previously disconnected systems, following your labeled guides and photographs. Pay particular attention to fuel lines, electrical connections, and cooling system components.
-
Refill Fluids
Add fresh engine oil, coolant, and other fluids to the appropriate levels. Double-check all drain plugs and connections for tightness.
-
Initial Startup
Reconnect the battery, turn the ignition to the "on" position without starting the engine to prime the fuel system, then start the engine. Monitor for unusual noises, leaks, or warning lights.
-
Final Checks
After running the engine for several minutes, check again for leaks and proper operation of all systems. Verify oil pressure, cooling system function, and charging system performance.
DIY Tip: After completing the installation, drive the vehicle conservatively for the first 500 miles (800 km) to allow proper break-in of engine components. Change the oil and filter after this initial break-in period, even if it's sooner than the regular maintenance interval.
Frequently Asked Questions
Q1: How long does a 300 TDI engine typically last before bearing failure?
The 300 TDI engine is renowned for its longevity, with main and rod bearings often lasting 200,000-300,000 miles (320,000-480,000 km) under proper maintenance conditions. Factors that influence bearing life include:
- Oil quality and change frequency
- Operating conditions (excessive idling, overloading, extreme temperatures)
- Driving style (high RPM operation accelerates wear)
- Oil pressure maintenance
Regular oil analysis can help predict bearing wear before catastrophic failure occurs.
Q2: What are the warning signs of bearing wear in a 300 TDI engine?
You can identify potential bearing problems by watching for these symptoms:
- Knocking sounds: Particularly noticeable at idle or under load, often described as a deep, rhythmic knocking
- Low oil pressure: Worn bearings increase clearances, reducing oil pressure
- Metal particles in oil: Visible on the dipstick or during oil changes
- Increased oil consumption: Worn bearings can allow oil to escape into the combustion chamber
- Reduced power output: As bearing wear progresses, the engine loses efficiency
- Oil pressure warning light: Illumination at idle when the engine is warm can indicate advanced bearing wear
Q3: Can engine bearings be replaced without removing the engine?
While theoretically possible, replacing main bearings and connecting rod bearings in a 300 TDI without removing the engine is extremely challenging and not recommended for several reasons:
- Limited access to crankshaft and bearings within the engine bay
- Difficulty maintaining cleanliness in an open engine
- Challenges in properly torquing critical components
- Increased risk of improper reassembly
For most DIY mechanics, removing the engine and performing the work on an engine stand provides better results and may actually save time in the long run. Professional mechanics with specialized equipment may perform in-vehicle bearing replacements in some situations.
Q4: How long does a 300 TDI engine replacement typically take?
The time required to replace a 300 TDI engine varies based on several factors:
- Experience level:
- Professional mechanic: 8-12 hours
- Experienced DIY mechanic: 16-24 hours
- Novice DIY mechanic: 30+ hours spread over multiple days
- Vehicle accessibility: Working in a well-equipped garage with a lift reduces time significantly compared to working outdoors or in limited space
- Condition of fasteners: Rusted or seized bolts can substantially increase the time required
- Modification requirements: If adaptations are needed for the new engine, additional time will be required
Most DIY enthusiasts should plan for a full weekend project at minimum, with potential spillover into additional days for unexpected complications.


 浙公网安备 33010002000092号
 浙B2-20120091-4