Types of 7700103069A
There are different types of 7700103069A to meet various needs. Here are some of them:
-
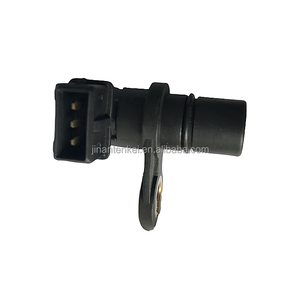
7700103069A
Rocker arms are levers that control the opening and closing of engine valves. They are positioned on the valve stem side and pivot on the shaft or pedestal. One end of the rocker arm is usually equipped with a roller or pad that makes contact with the valve stem, while the other end interfaces with the camshaft or cam lobe. When the camshaft rotates, it pushes the roller or pad against the rocker arm, causing it to pivot. This rocking motion allows the other end of the rocker arm to push down on the valve stem, opening the valve. Simultaneously, a spring located beneath the valve stem pushes the rocker arm in the opposite direction, ensuring that the valve closes when the camshaft is not pressing on it.
The 7700103069A rockers are typically made from cast iron or aluminum, and the number of rocker arms required for an engine depends on its configuration. For instance, V-type engines require two sets of rocker arms, one for each cylinder bank. In contrast, inline engines only need a single set of rocker arms. The configuration and arrangement of the rocker arms may vary based on the engine design. Some engines use overhead cam designs, where the camshaft is located above the cylinder head. In such cases, the camshaft directly operates the valves without the need for rocker arms.
-
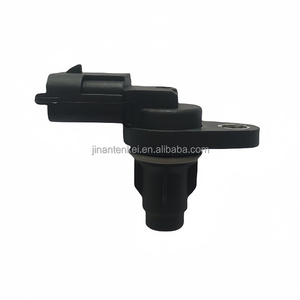
7700103069B
Rocker arm shafts are used in engines with overhead valve (OHV) or pushrod valve (PV) configurations. They are responsible for actuating the engine's intake and exhaust valves. In most instances, rocker arm shafts are used in place of individual rocker arm studs. They serve to hold the rocker arms in place and provide a pivot point for their oscillation.
-
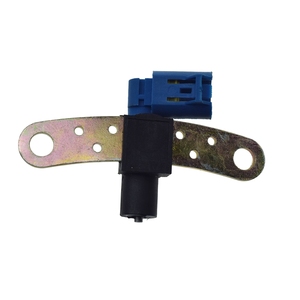
7700103070A
Valve spring retainers are important components of the valve train system. They play a crucial role in holding valve springs in place, ensuring that the springs remain properly seated on the engine's cylinder head. A proper valve spring seating is essential for maintaining the engine's performance and efficiency.
-
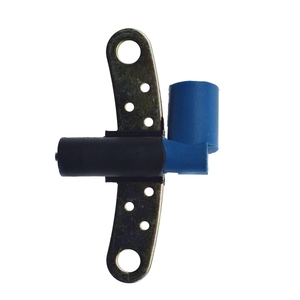
7700103071A
Valve tappets, also known as lifters or buckets, are used in the 7700103069A rockers. They play a crucial role in transmitting the motion of the camshaft to the valves, ensuring precise timing and actuation of the engine's air intake and exhaust. In most cases, the valve tappets fit into the rocker arm assembly, providing a smooth interface between the rocker arms and the camshaft.
Specification and Maintenance of 7700103069a
Specifications are essential parts of any product because they provide detailed information about the product's capabilities, functions, and features. Here are some of the specifications of the 7700103069a:
-
Model Number:
Every 7700103069a has a specific model number. The model number indicates the version and manufacturer of the 7700103069a.
-
Voltage:
The 7700103069a ignition coil requires a voltage of 12V, just like most car electrical systems. The coil receives this voltage from the battery. It is also used to generate high-voltage pulses that power the spark plugs.
-
Current:
Ignition coils use currents of between 0.5 and 1.0 amps. The current is used during the charging and discharging of magnetic fields in the coil.
-
Resistance:
The resistance of the 7700103069a ignition coil is between 1.0 and 3.0 ohms. This resistance is important because it controls the amount of current flowing through the coil.
-
High Voltage Output:
The 7700103069a ignition coil generates high-voltage outputs of between 20,000 and 45,000 volts. This output is important for overcoming the resistance in the spark plug gap and ensuring a spark is generated.
-
Coil Configuration:
Coils are configured in either a single or multiple arrangement. Ignition systems that use SLI and MSD coils require 7700103069a coils.
Maintaining the 7700103069a ignition coil is very important. This is because proper maintenance ensures that the vehicle runs smoothly and efficiently. Here are some of the maintenance practices for the 7700103069a ignition coil:
- Regular Inspection: Having a professional mechanic inspect the ignition coil regularly is very important. This is because the mechanic will be able to detect signs of wear, damage, or corrosion that the car owner might not see.
- Check for Warning Signs: The car owner should always be on the lookout for warning signs that show the ignition coil is faulty. Some of these signs include having difficulty starting the car, having a rough idle, or experiencing a lack of power when accelerating. When these signs are present, the ignition coil should be checked.
- Scheduled Maintenance: The 7700103069a ignition coil, just like any other component of the car, requires regular scheduled maintenance. This maintenance can be in the form of tune-ups, spark plug inspections, or other recommended services from the vehicle's owner's manual.
- Clean the Ignition: The 7700103069a ignition coil requires regular cleaning. This cleaning can be done by using a soft brush or cloth to remove dirt, debris, and dust from the coil and its surrounding area.
- Use Quality Replacement Parts: If there is the need to replace parts of the ignition system, the car owner should ensure that the mechanic uses high-quality parts that are compatible with the 7700103069a ignition system. This is because low-quality parts can affect the performance of the ignition coil.
- Avoid Electrical Modifications: The 7700103069a ignition coil is designed to work with the vehicle's electrical system. The car owner should avoid making any modifications to the electrical system, as this can affect the performance of the ignition coil.
How to Choose 7700103069a
Choosing the right 7700103069a accessory for a vehicle can be a daunting task, but it doesn't have to be. Here are some helpful tips that will make the process easier.
First and foremost, it is important to know the vehicle's make, model, and year of production. This information is crucial as it helps to choose accessories that are compatible with the vehicle.
Consider the brand of the vehicle. Some brands offer accessories that are specifically designed for their vehicles. These accessories are often of high quality and fit perfectly, making them a great choice for any car owner.
When choosing 7700103069a, prioritize essential accessories that improve convenience, safety, and comfort. Examples of such accessories include GPS navigation systems, backup cameras, and Bluetooth hands-free systems. These accessories enhance the driving experience and ensure safety on the road.
Set a budget before purchasing any vehicle accessory. This helps to narrow down options and make informed decisions. Keep in mind that the most expensive accessory is not necessarily the best. Look for quality accessories that offer value for money.
Read reviews and seek recommendations from friends and family who own similar vehicles. This helps to choose accessories that are tried and tested, ensuring satisfaction with the purchase.
Consider the ease of installation when choosing 7700100069a. Some accessories require professional installation, which can be an added cost. Opt for accessories that are easy to install and come with clear instructions.
Finally, take advantage of warranties and guarantees offered by manufacturers. This gives peace of mind knowing that the purchase is protected in case of defects or damage.
How to DIY and Replace 7700103069a
Here are some simple steps that can help replace 7700103069a:
-
Identify the Problem
Firstly, the issue that is affecting the part of the vehicle that is controlled by the relay should be identified. This could be anything from door locks not working to a motor not running.
-
Check the Wiring Diagram
To know what function the relay controls and to confirm whether the relay is the cause of the problem, the wiring diagram of the vehicle should be obtained.
-
Remove the Relay
The relay should be removed from its socket carefully without damaging the wires or the socket.
-
Test the Relay
A relay tester should be used to check if the relay is functioning. If a relay tester is not available, another relay with the same part number should be used to test the circuit.
-
Replace the Relay
If it is confirmed that the relay is faulty, a new relay should be obtained and installed. The new relay should be made to have the same part number and specifications as the old one.
-
Check the Circuit
After replacing the relay, the circuit should be checked again to make sure it is working.
Q and A
Q1: How do I know if an air filter needs to be replaced?
A1: Signs that an air filter needs replacement include reduced engine performance, increased fuel consumption, visible dirt or damage on the filter, and warning lights on the dashboard. It's also advisable to check the filter regularly, at least every 10,000 miles or during oil changes.
Q2: What tools are needed to replace an air filter?
A2: Replacing an air filter usually requires no more than an air filter replacement tool. However, depending on the car model, one may need screwdrivers, pliers, or a socket wrench to remove the air filter cover.
Q3: Is it necessary to use the recommended air filter for my vehicle?
A3: Using the recommended air filter is important as it ensures compatibility with the vehicle. Additionally, it meets the manufacturer's specifications, maintaining warranty validity and optimal engine performance.
Q4: Can I replace the air filter myself?
A4: Yes, anyone can replace an air filter. It's a simple DIY task that requires minimal tools. The process is usually straightforward, and many manufacturers provide instructions in the owner's manual or on the filter packaging.
Q5: How long does it take to replace an air filter?
A5: Replacing an air filter takes 10 to 30 minutes, depending on accessibility and familiarity with the filter location.


 浙公网安备 33010002000092号
 浙B2-20120091-4